Hi-Trans Online
- Lloyd Jones (Unlicensed)
- Adrian Cooper
- Tina Mott
Welcome To Hi-Trans Online Support
Hi-Trans Online allows you to create consignments, book pickups, and track your freight as it moves through the Hi-Trans network. Our guides will help you to prepare and label your freight, and view a quick guide on how to create a consignment and book a pickup using Hi-Trans Online.
For further assistance, please contact the Hi-Trans Express I.T. Department between 8am and 5pm (CST) Monday to Friday on (08) 8447 9766, or email helpdesk@hi-trans.com.au
STEP BY STEP GUIDES
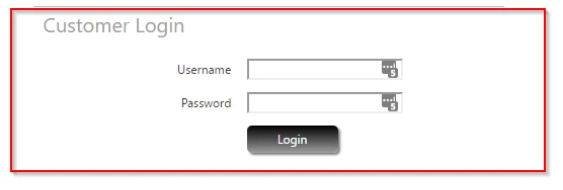
Access Hi-Trans Online from www.hi-trans.com.au and click Login:

Enter your username and password, and click Login (note that login details are case sensitive):
You have the ability to create as many consignments as you wish and release them when you're ready. Creating a consignment will save it with an 'on hold' status until you 'release' it. See 'How to Release a Consignment and Book a Pickup' for the next steps.
Data Import
If you are set up to import consignment data into Hi-Trans Online via another system, use the Create Pickup option from the home screen menu instead of the Create Consignment function.
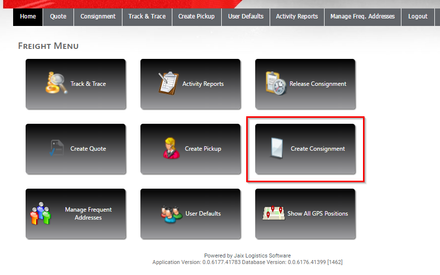
Click on Create Consignment:
In the Main Details area:

Step 1
The despatch date will default to the current date, but you can click on the dropdown arrow to select a future date if required.
Step 2
Select the account to be charged for the service. If you have multiple accounts, click on the dropdown arrow and select from the list.
Step 3
Optional - you can type in a senders reference if you like (maximum length is 12 characters).
Step 4
Click the dropdown arrow and select the service that you would like the freight to travel on.
Adding the Sender & Receiver Details:
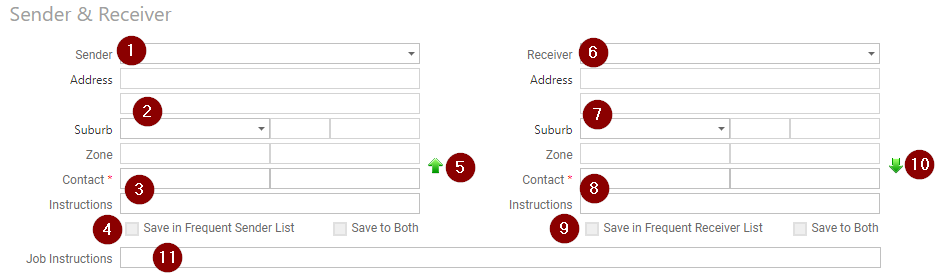
Step 1
Type in a new senders name, or click on the dropdown arrow and select from the list.
Step 2
Type in the sender's address and press Enter.
Start typing the suburb name and the system will generate a dropdown list of suburbs for you to select from. Click on the correct suburb to select it, or use the arrow down key and hit Enter.
Step 3
Type in the name of a contact person and press Enter, then add their phone number and press Enter.
Optional - add any specific instructions (e.g. pickup from dock 2) and press Enter.
Step 4
Optional - click on Save in Frequent Sender List to save the senders details. The sender will be available in the dropdown list for you to select in future.
Step 5
If you are dropping your freight into a Hi-Trans depot, click the green arrow.
Step 6
Type in a new receivers name, or click on the dropdown arrow and select from the list.
Step 7
Type in the receiver's address and press Enter.
Start typing the suburb name and the system will generate a dropdown list of suburbs for you to select from. Click on the correct suburb to select it, or use the arrow down key and hit Enter.
Step 8
Type in the name of a contact person and press Enter, then add their phone number and press Enter.
Optional - add any specific instructions (e.g. deliver to rear shed) and press Enter.
Step 9
Optional - click on Save in Frequent Receiver List to save the receiver's details. The receiver will be available in the dropdown list for you to select in future.
Step 10
If the receiver will be picking up the freight from a Hi-Trans depot, click the green arrow.
Step 11
Optional - additional job instructions can be added here if required.
Adding the Consignment Details:
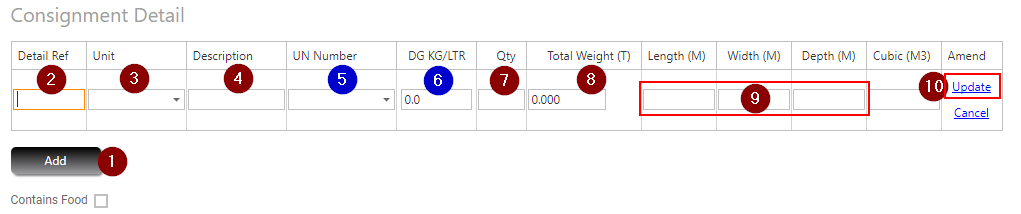
Step 1
Click the Add button.
Step 2
Optional - add a reference for your freight if you wish.
Step 3
Select the unit type from the dropdown list if available, or leave this option to its default setting.
Step 4
Type in the descripton of the freight. If you have the product feature enabled, click the drodown arrow and select the appropriate product from the list. If you would like the product feature enabled, please contact the Hi-Trans I.T. Department.
Step 5
For dangerous goods only - click the dropdown arrow and select the correct UN code. If you have more than one type of dangerous goods on that item, select '0000 Mixed' from the list and type the UN#'s in the Job Instructions field.
Step 6
For dangerous goods only - enter the amount of dangerous goods in kg or litres. Do not include the weight of the pallet or non-DG items in this field - only the amount of DG. This information is important because it determines whether or not a vehicle needs to display placards.
Dangerous Goods
Please ensure any consignment containing dangerous goods is properly packaged, labelled, and accompanied by the correct DG documentation as outlined in the Australian Dangerous Goods Code. It is an offence to transport DG without the proper documentation.
Step 7
Type the quantity.
Step 8
Type in the total weight in tonnes (including the pallet). The system default is set to tonnes. If you require a kilogram setting, please contact Hi-Trans I.T. Department to enable this option for you.
Step 9
Type in the dimensions of the freight - length (L), width (W) and depth (D) in metres (e.g. 1.0 = 1 metre). The system will automatically calculate the cubic field.
Step 10
Click Update to save this item. Click Add if you wish to add further items to this consignment.
Adding the Timeslot Details:
Note: Leave Blank if your freight does not require a time-slot

The timeslot details section is for timeslot freight only. Timeslot freight usually applies to deliveries into distribution centres (e.g. IGA, Woolworths, Aldi etc.). Additional charges usually apply for timeslot deliveries.
Select the required delivery date and time from the dropdown lists. Tick the 'timeslot is pre-booked' box if you have already booked your slot with the receiver.
Adding the Pallet Details:

Step 1
Please calculate the number of pallet / cubic spaces based on the dimensions of your freight. Anything beyond 1.2m length or 1.2m width needs two spaces.
Step 2
Mandatory field - enter the number of Chep pallets on this consignment if transferring to Hi-Trans Express. If none, enter a zero.
Step 3
Mandatory field - enter the number of Loscam pallets on this consignment if transferring to Hi-Trans Express. If none, enter a zero.
Step 4
Enter the number of Chep or Loscam pallets on this consignment if transferring directly to the receiver.
Step 5
If transferring Chep or Loscam pallets, enter the docket number in this field and remember to give a copy of the docket to the Hi-Trans driver.
Reviewing and Saving the Data:

Step 1
Check your consignment and click Save.
If you wish to see the price of your consignment, click Show Price, then click Save.
![]()
Step 2
Click on Print Consignment and Print Labels to produce printed copies (watch the How to Label Your Freight video for a quick guide).
Step 3
Click on Create Another Consignment if required, or click Done.
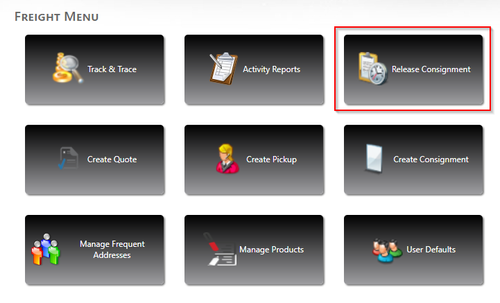
Next Steps
Your consignment is now created with an 'on hold' status and must be 'released' to export the data to Hi-Trans' freight system. Refer to the Release a Consignment guide for the next steps.
After creating your consignments, they must be 'released' to export the data into Hi-Trans' freight system. A pickup booking can be made at this point if required.
Data Import
If you are set up to import consignment data into Hi-Trans Online via another system, use the Create Pickup option from the home screen menu instead.
Step 1
Click on Release Consignment:
Step 2
A list of consignments on hold will appear. Click the Tick to Release box against the consignments you wish to export to Hi-Trans Express.
If you wish to book a pickup, click Create Pickup and select your required pickup date and time, and the closing time:

Please ensure there is at least 30 minutes between the ready time and closing time to allow for any delays.
Matching Pickups
Multiple consignments can be matched to an existing pickup if the sender details match. To match pickup, tick the consignments required and click on Match Pickup

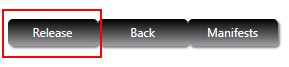
Step 3
Click Release:
Step 4
You will now have the option to print a manifest. Print 2 copies - one for your records, and one for the Hi-Trans driver.
If you have created a consignment that is no longer required, follow these steps to delete it.
Step 1
Click on Release Consignment:
Step 2
A list of consignments on hold will appear. Click the  against the consignments you wish to delete:

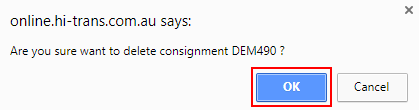
Step 3
A pop-up confirmation will appear. Click OK and your consignment will be deleted:
If you need to make changes to a held consignment before releasing it, follow these steps.
Step 1
Click on Release Consignment:
Step 2
A list of consignments on hold will appear. Click the  against the consignment you wish to amend:
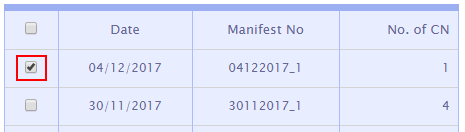
If you need to print a manifest that has been released, follow these steps.
Step 1
Click on Release Consignment:
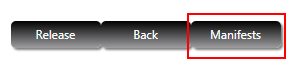
Step 2
Click Manifests and tick the box next to the ones you wish to reprint:
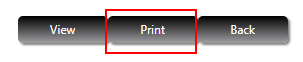
Step 3
Click Print:
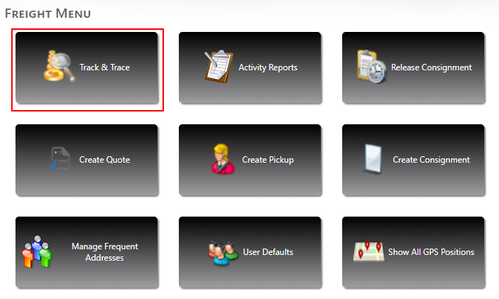
Using the Track & Trace feature will give you a detailed look at the movement of your freight. You will also be able to see the scanned POD (proof of delivery) and signature on glass.
Step 1
Click Track & Trace:
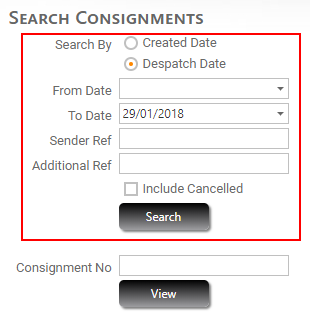
Step 2
If you know the consignment number, type it into the Consignment No field and click View:

If you don't know the consignment number, set the search criteria accordingly and click Search:
Step 3
A list of your consignments will appear, the image below shows the information available to you at a glance. Click on any Consignment No from the report list to view it in detail.
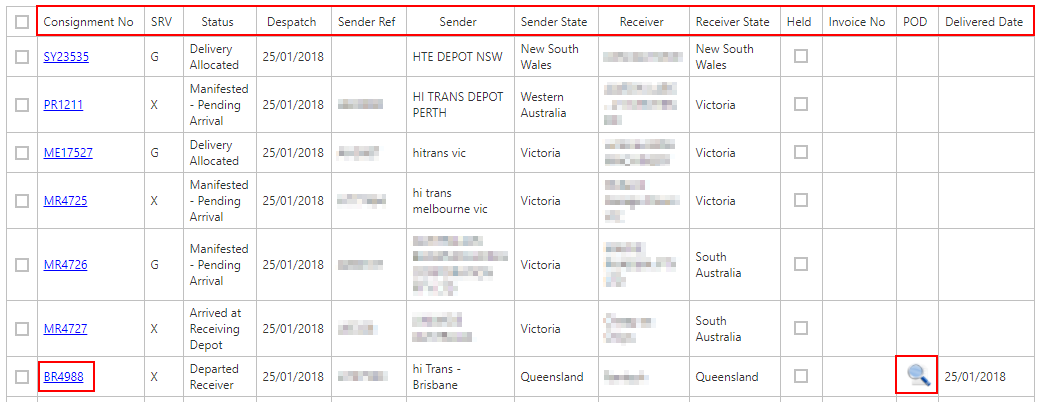
You will also have the options to print consignments and/or labels, or export the list to a pdf document:
![]()
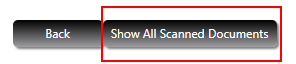
Step 4
Clicking on the will show a copy of the signature on glass. Click on Show All Scanned Documents to see scanned images of POD documents:
Track and trace your freight by using the pickup booking data. This screen also allows you to view and print any pickups that have been created.
Step 1
Click Track & Trace and then click Pickups:

Step 2
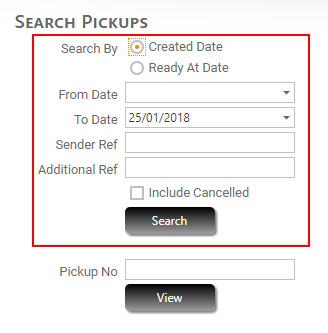
If you know the pickup number, type it into the Pickup Number field and click View:
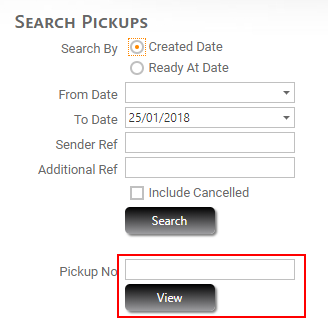
If you don't know the pickup number, select the search criteria accordingly and click Search:
Step 3
Click on any Pickup No from the report list to view it.
When viewing your consignment from the Track & Trace screen, additional information will be available to you. Here's what it all means.
The truck icon will show the current status of your consignment as it moves through the Hi-Trans network. The example below shows the consignment is at the delivery stage:
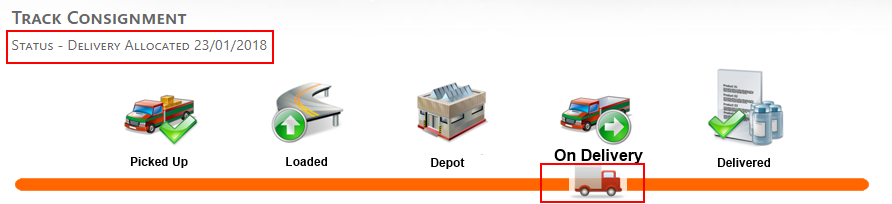
Truck's Movement
The Trucks movement shows what stage your freight has progressed to
A copy of the invoice will be made available in the Main Details section. Click on the icon to view it:

Rated price details are shown in the Delivery Details area:

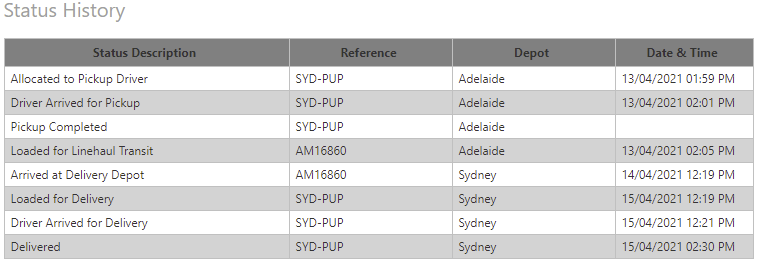
The status history area shows the details of each movement of your consignment:
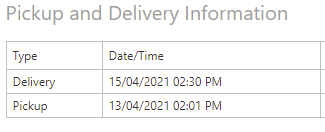
Details of pickup and delivery information are shown:
Details of when the POD was uploaded to the system are shown:

Not Delivery Time / Day
Note the POD DateTime is not the delivery time, it is the time the POD data was uploaded to our system
Scanned POD (proof of delivery) documents are available:

Click The Link Below To See Advanced Tracking Details
| Unallocated Status |
|---|
|
Current status - Unallocated
|

| Pickup Allocation / Arrived Status' |
|---|
|
Current status - Allocated To Pickup Driver
Current status - Driver Arrived For Pickup
|

| Pickup Completion |
|---|
|
Current status - Pickup Completed
|


| Loaded On To Linehaul Vehicle |
|---|
|
Current status - Loaded For Linehaul Transit
|


| Arrived At Receiving Depot |
|---|
|
Current status - Arrived At Receiving Depot
|


| Onboard For Delivery - Metro Work |
|---|
|
Current status - Loaded For Delivery
Current status - Driver Arrived For Delivery
|


| Onboard For Delivery - Regional Work |
|---|
|
Current status - Loaded For Delivery
|

| Onboard For Delivery - Delivered |
|---|
|
Current status - Delivered
|


Hi-Trans Online allows you to customise the default settings to suit your needs.
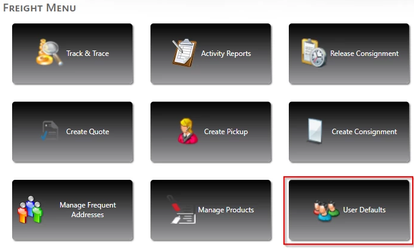
Click on User Defaults from the Home screen menu:
Click the dropdown arrow in the default service field and select the service type that you use most often:

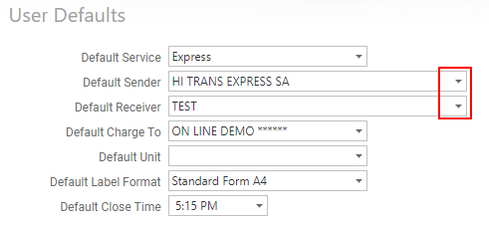
Click the dropdown arrow in the default sender and default receiver fields to select the sender and receiver you use most often:
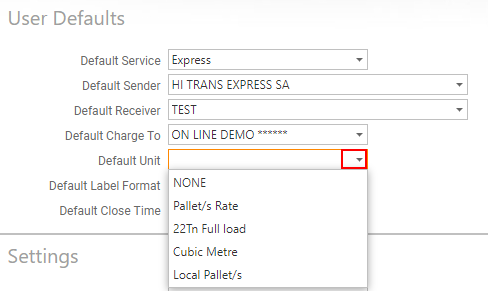
Click the dropdown arrow in the default unit field to select the type of freight you send most often:
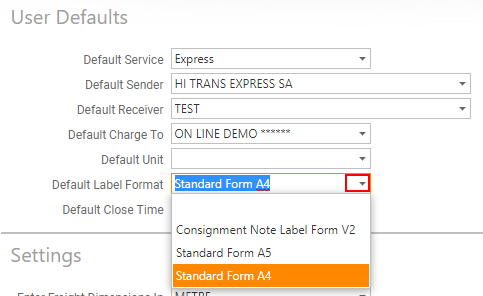
Click the dropdown arrow in the default label format field to select the format you need (see the How to Label Your Freight video for more details on label print settings):
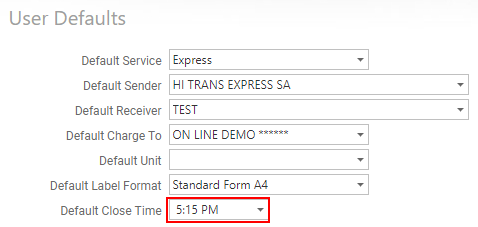
Set the default close time of the sender:
Click the dropdown arrow in the freight dimensions field to select the measurement that suits your freight:
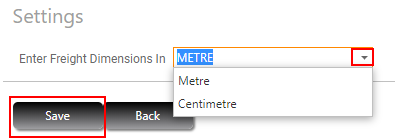
Click Save to save your default settings.
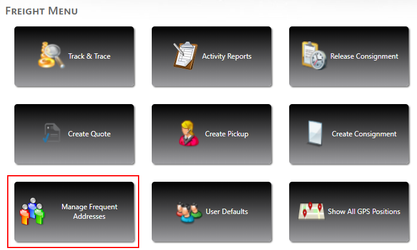
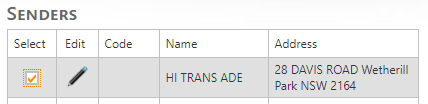
Frequently used sender and receiver addresses can be saved by ticking the Save to Frequent box when creating a consignment. They can also be entered and managed from the Manage Frequent Addresses area by following these steps.
Click on Manage Frequent Addresses from the Home screen menu:
A list of your saved senders and receivers will appear for you to edit or delete.
Add
To add a new record, click on Add near the bottom of the screen:
![]()
Complete the details:
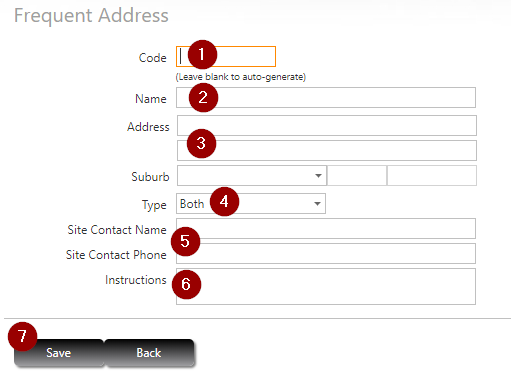
- Type in a code if you would like to allocate one to this record, or leave this field blank for the system to generate one automatically.
- Enter the name as you would like it to appear on the consignment.
- Type in the address details. As you start typing in the suburb name, a list of suburbs will appear for you to select from.
- Select if you want this record to be saved as a sender or receiver, or both.
- Type in the contact name and phone number of someone who is on site.
- Type in specific instructions (if any).
- Click Save.
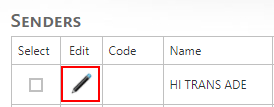
Edit
To edit a saved record, click on the pencil icon, make your changes and Save:
Copy
To copy a sender to the receiver list, or vice versa, click to select the record and click the arrow to copy it across to the other list:

Delete
To delete a record from the frequent list, click to select it and click Delete:
![]()
Hi-Trans Online will work with most modern operating systems as long as the following minimum requirements are met:
HI-Trans Online is capable of importing senders and receivers from other freight carriers systems by following these steps.
This quick guide area will show you how each field appears on both the consignment & label
.png?version=2&modificationDate=1581546386596&cacheVersion=1&api=v2)
.png?version=1&modificationDate=1581546199044&cacheVersion=1&api=v2&width=700&height=509) | .png?version=1&modificationDate=1581546220669&cacheVersion=1&api=v2&width=350&height=512) |
|---|
Using the colour coding on the printouts above (consignment note & label), below is a break down of the colour coding.
- Red - Consignment Number
- Light Green - Dispatch Date
- Dark Green - Service Code Used
- Yellow - Consignment Reference Number
- Purple - Sender Information
- Blue - Receiver Information
- Black - Receiver Location's State & Postcode
- Light Grey - Total Number Of Items