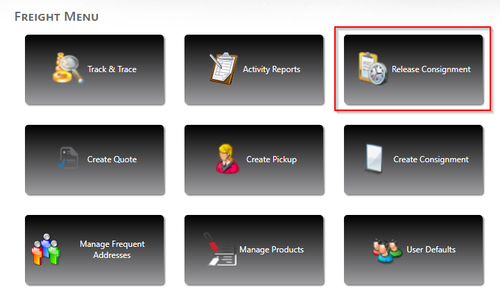
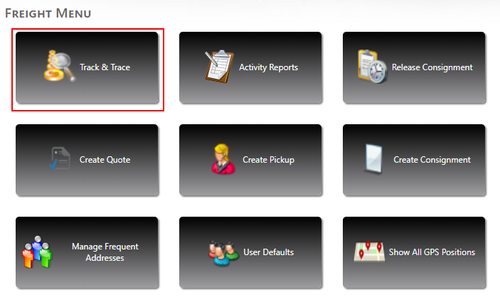
Click on Create Consignment: 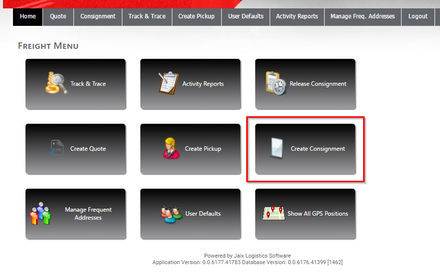
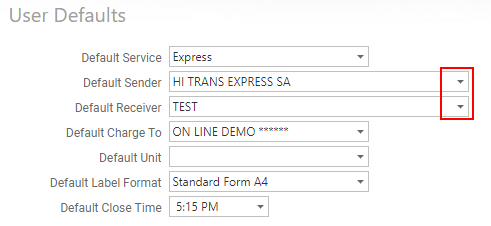
In the Main Details area:
Step 1The despatch date will default to the current date, but you can click on the dropdown arrow to select a future date if required. Step 2Select the account to be charged for the service. If you have multiple accounts, click on the dropdown arrow and select from the list. Step 3Optional - you can type in a senders reference if you like (maximum length is 12 characters). Step 4Click the dropdown arrow and select the service that you would like the freight to travel on.
Adding the Sender & Receiver Details: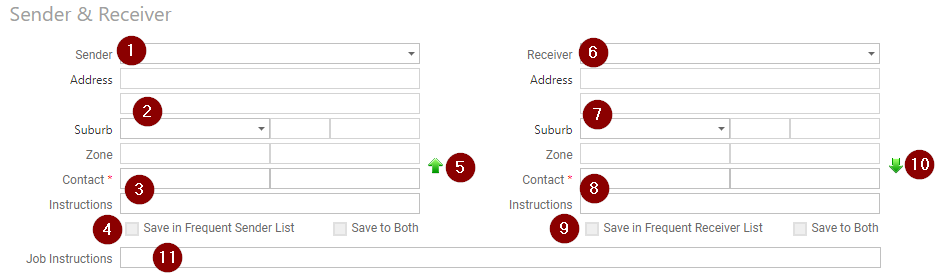
Step 1Type in a new senders name, or click on the dropdown arrow and select from the list. Step 2Type in the sender's address and press Enter. Start typing the suburb name and the system will generate a dropdown list of suburbs for you to select from. Click on the correct suburb to select it, or use the arrow down key and hit Enter. Step 3Type in the name of a contact person and press Enter, then add their phone number and press Enter. Optional - add any specific instructions (e.g. pickup from dock 2) and press Enter. Step 4Optional - click on Save in Frequent Sender List to save the senders details. The sender will be available in the dropdown list for you to select in future. Step 5If you are dropping your freight into a Hi-Trans depot, click the green arrow. Step 6Type in a new receivers name, or click on the dropdown arrow and select from the list. Step 7Type in the receiver's address and press Enter. Start typing the suburb name and the system will generate a dropdown list of suburbs for you to select from. Click on the correct suburb to select it, or use the arrow down key and hit Enter. Step 8Type in the name of a contact person and press Enter, then add their phone number and press Enter. Optional - add any specific instructions (e.g. deliver to rear shed) and press Enter. Step 9Optional - click on Save in Frequent Receiver List to save the receiver's details. The receiver will be available in the dropdown list for you to select in future. Step 10If the receiver will be picking up the freight from a Hi-Trans depot, click the green arrow. Step 11Optional - additional job instructions can be added here if required.
Adding the Consignment Details: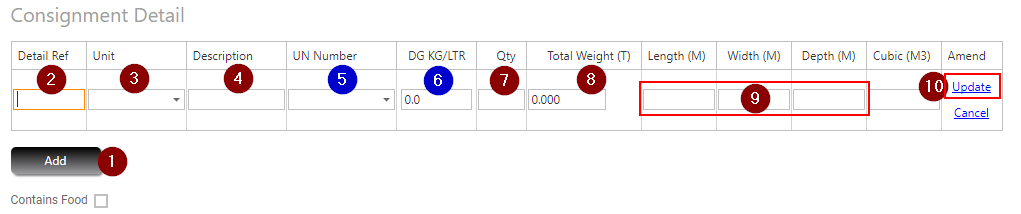
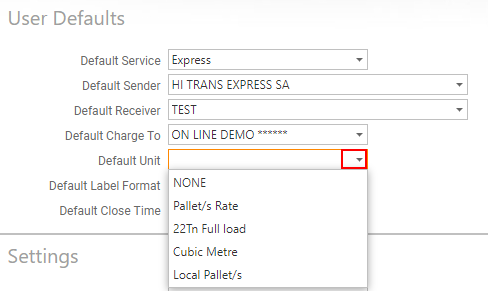
Step 1Click the Add button. Step 2Optional - add a reference for your freight if you wish. Step 3Select the unit type from the dropdown list if available, or leave this option to its default setting. Step 4Type in the descripton of the freight. If you have the product feature enabled, click the drodown arrow and select the appropriate product from the list. If you would like the product feature enabled, please contact the Hi-Trans I.T. Department. Step 5For dangerous goods only - click the dropdown arrow and select the correct UN code. If you have more than one type of dangerous goods on that item, select '0000 Mixed' from the list and type the UN#'s in the Job Instructions field. Step 6For dangerous goods only - enter the amount of dangerous goods in kg or litres. Do not include the weight of the pallet or non-DG items in this field - only the amount of DG. This information is important because it determines whether or not a vehicle needs to display placards. | Note |
|---|
| Please ensure any consignment containing dangerous goods is properly packaged, labelled, and accompanied by the correct DG documentation as outlined in the Australian Dangerous Goods Code. It is an offence to transport DG without the proper documentation. |
Step 7Type the quantity. Step 8Type in the total weight in tonnes (including the pallet). The system default is set to tonnes. If you require a kilogram setting, please contact Hi-Trans I.T. Department to enable this option for you. Step 9Type in the dimensions of the freight - length (L), width (W) and depth (D) in metres (e.g. 1.0 = 1 metre). The system will automatically calculate the cubic field. Step 10Click Update to save this item. Click Add if you wish to add further items to this consignment.
Adding the Timeslot Details:Note: Leave Blank if your freight does not require a time-slot
The timeslot details section is for timeslot freight only. Timeslot freight usually applies to deliveries into distribution centres (e.g. IGA, Woolworths, Aldi etc.). Additional charges usually apply for timeslot deliveries. Select the required delivery date and time from the dropdown lists. Tick the 'timeslot is pre-booked' box if you have already booked your slot with the receiver.
Adding the Pallet Details:
Step 1Please calculate the number of pallet / cubic spaces based on the dimensions of your freight. Anything beyond 1.2m length or 1.2m width needs two spaces. Step 2Mandatory field - enter the number of Chep pallets on this consignment if transferring to Hi-Trans Express. If none, enter a zero. Step 3Mandatory field - enter the number of Loscam pallets on this consignment if transferring to Hi-Trans Express. If none, enter a zero. Step 4Enter the number of Chep or Loscam pallets on this consignment if transferring directly to the receiver. Step 5If transferring Chep or Loscam pallets, enter the docket number in this field and remember to give a copy of the docket to the Hi-Trans driver.
Reviewing and Saving the Data:
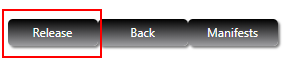
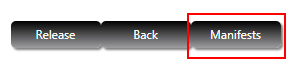
Step 1Check your consignment and click Save. If you wish to see the price of your consignment, click Show Price, then click Save.

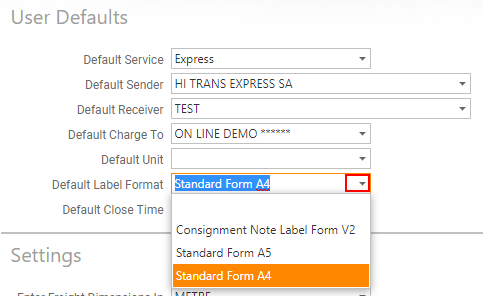
Step 2Click on Print Consignment and Print Labels to produce printed copies (watch the How to Label Your Freight video for a quick guide). Step 3Click on Create Another Consignment if required, or click Done.
| Info |
|---|
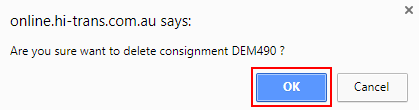
| Your consignment is now created with an 'on hold' status and must be 'released' to export the data to Hi-Trans' freight system. Refer to the Release a Consignment guide for the next steps. |
| 


.png?version=2&modificationDate=1581546386596&cacheVersion=1&api=v2)
.png?version=1&modificationDate=1581546199044&cacheVersion=1&api=v2&width=700)
.png?version=1&modificationDate=1581546220669&cacheVersion=1&api=v2&width=350)